Custom shape mask
Step:
1. After the layer is selected, a row of menu bars appears below the layer, and click the "Mask" button (slide left if you don't see it).
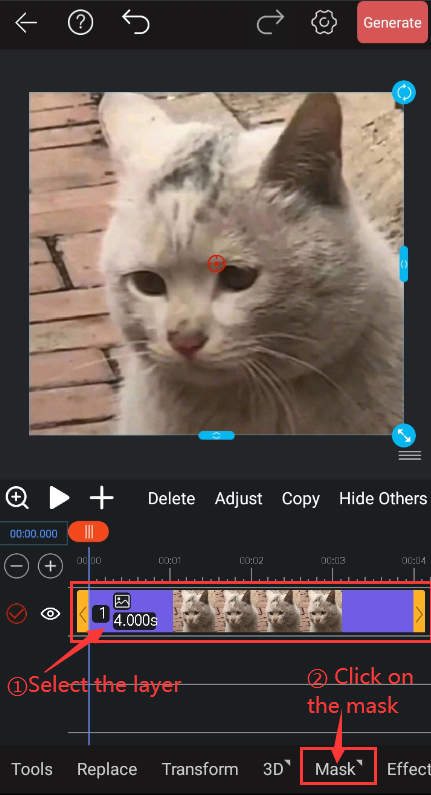
2. Click the "+" button.

3. Click the "Custom Shape" button on the left.

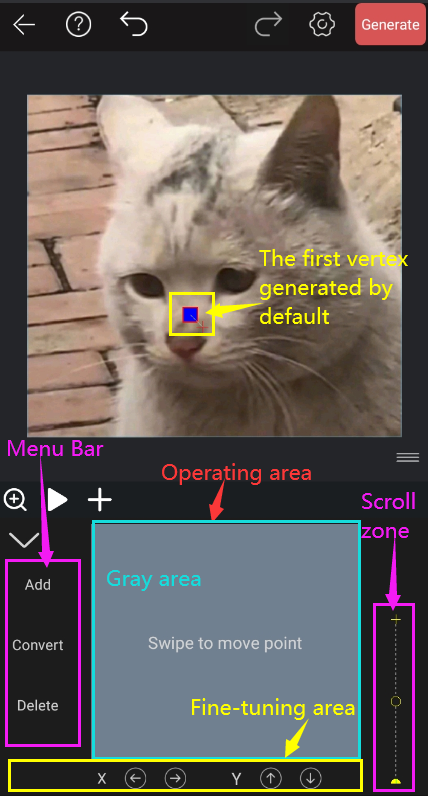
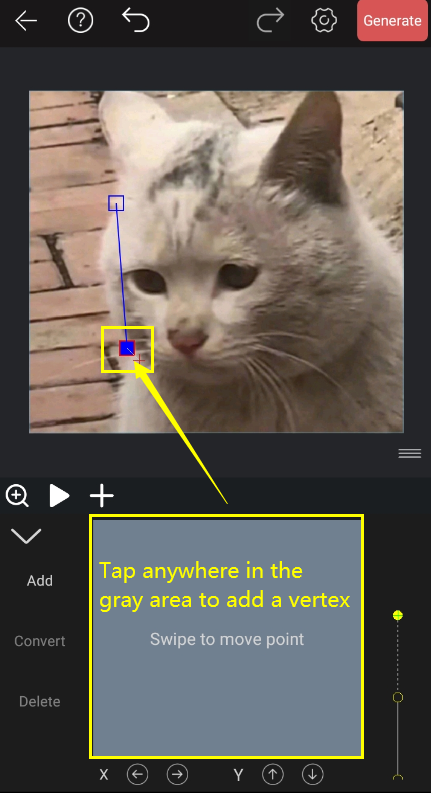
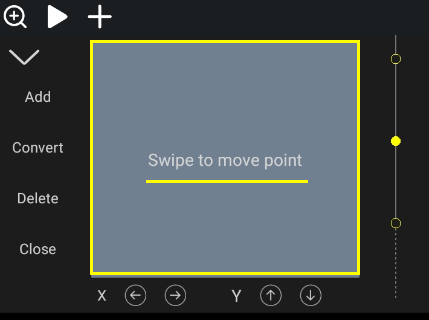
4. Enter the pen custom shape page, the first vertex will be generated by default, as shown in the figure below.
Add vertices
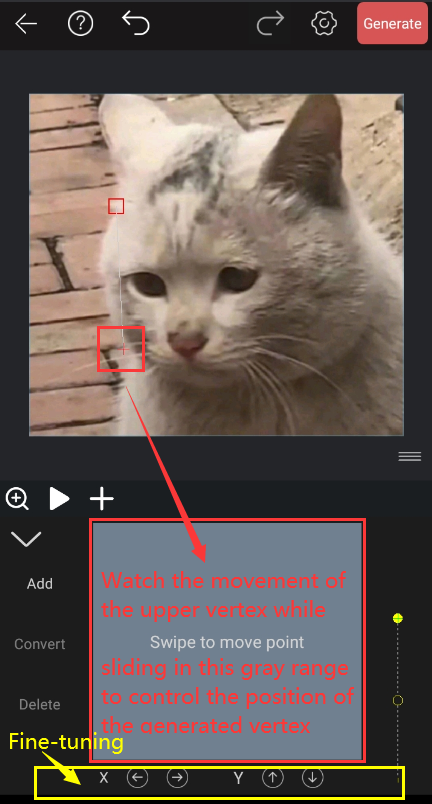
1. Watch the movement of the top vertex while sliding in the gray operation area to determine the position of the vertex; if you need to move accurately, you can adjust it by moving the fine adjustment button in the fine adjustment area.
2.After determining the vertex position, there are 2 ways to add vertices.
① Click anywhere in the gray operation area to add a vertex.
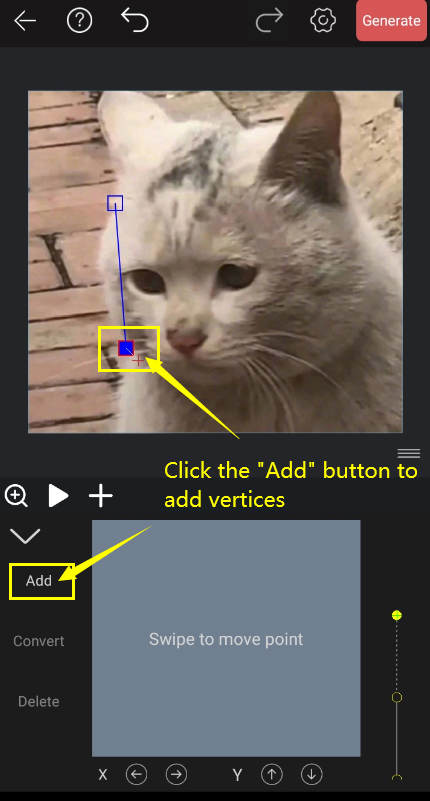
② Click the first "Add" button on the left menu bar to add a vertex.
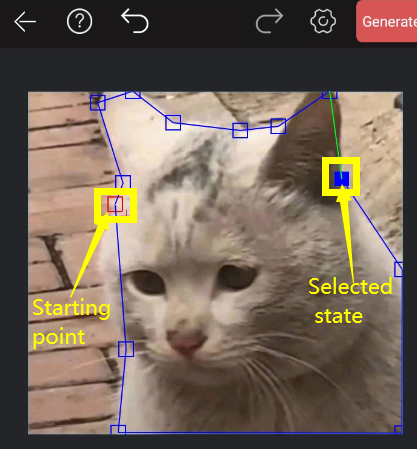
tips: Among them, the solid box is selected, and for the convenience of distinction, the starting vertex is a red hollow box, and the other vertices are blue hollow borders. As shown below.
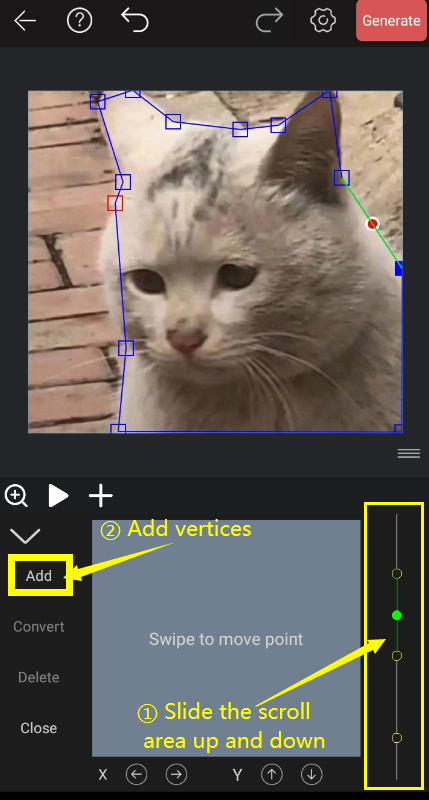
3. When you want to add another vertex between the two vertices, slide the right scroll area up and down, determine the position of the vertex according to the small dot, and add the vertex.
Select vertex
There are 2 ways to select vertices:
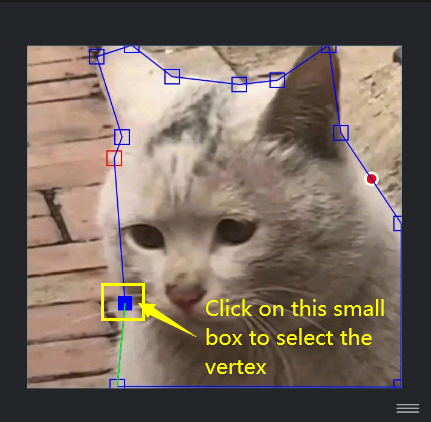
The first type: directly click on the small box to select the vertex.
The second kind: slide the scroll area on the right side up and down, and select the corresponding vertex.
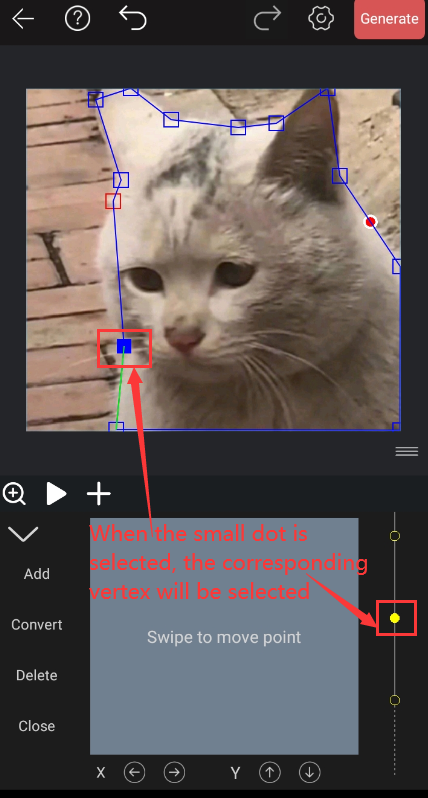
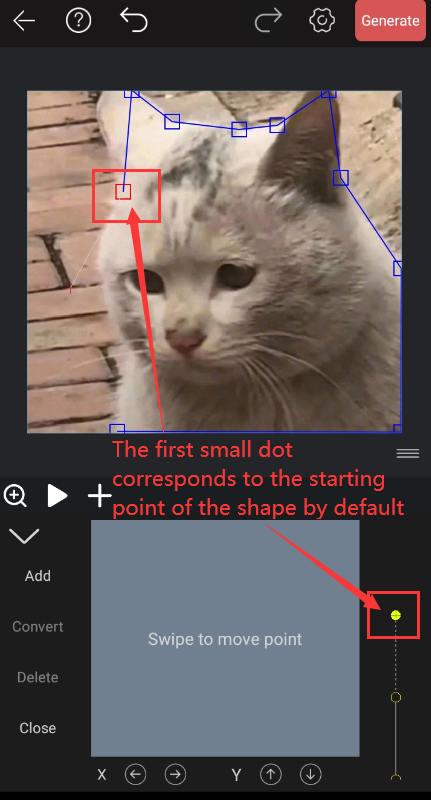
tips: Each yellow dot in the scroll area corresponds to a vertex, and each line segment corresponds to a line segment of the shape. The first yellow dot corresponds to the starting point of the shape by default, and the second yellow dot corresponds to the second added vertex, and it is sorted in this way.
Delete vertex
After selecting a vertex, click the third "Delete" button on the left menu bar to delete the vertex.

Move vertex
There are 2 ways to move vertices:
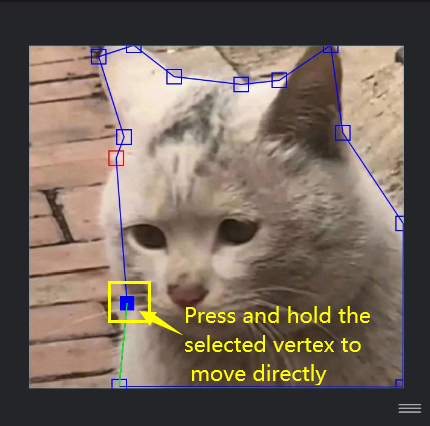
The first type: select the vertex, manually press and hold the vertex and move it.
The second type: select the vertex and slide in the gray area of the operation area to move the vertex.
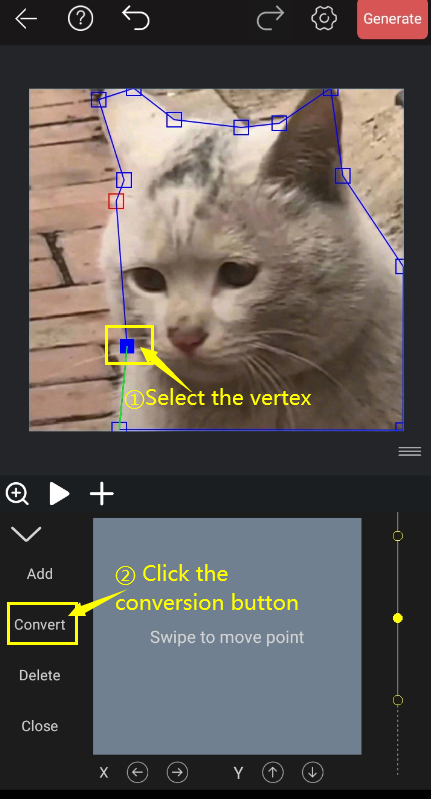
Convert
Conversion is to convert straight line segments on both sides of a vertex into curved line segments.
1. Select the vertex and click the second "Convert" button on the left menu bar.
2. The line segment on the two sides of the vertex will become a curve, and a curve and a control point will appear on both sides of the vertex (a small red and green circle as shown in the figure); at the same time, the line segments on both sides of the vertex on the right will change Form a curve, a small red and green box appears on both sides.
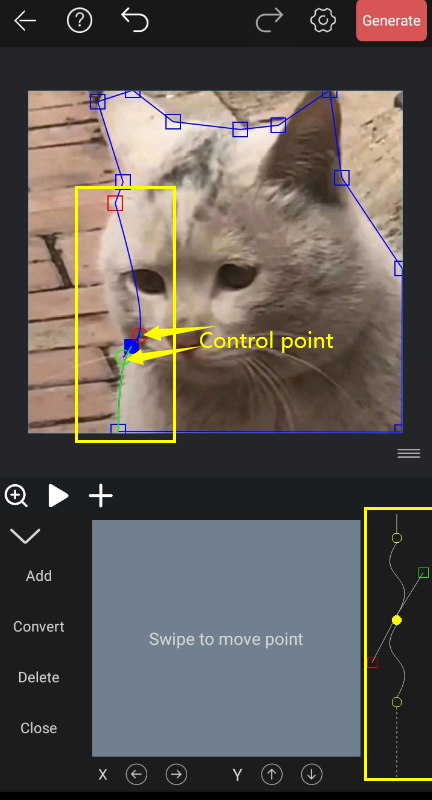
tips: When the adjacent vertex of the conversion vertex is selected, a curve control point will appear on the side close to the conversion vertex. As shown below.
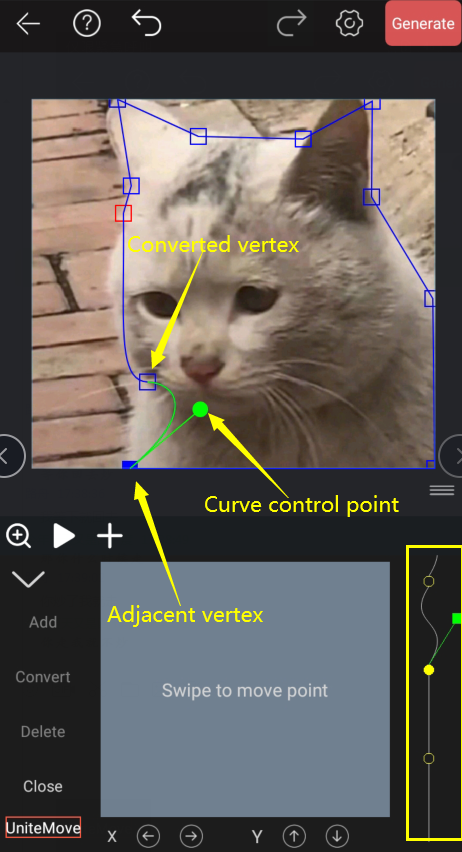

3. Click the control point manually. At this time, the small circle and the box become solid, which is the selected state. Move the curve control point to adjust the angle of the curve.
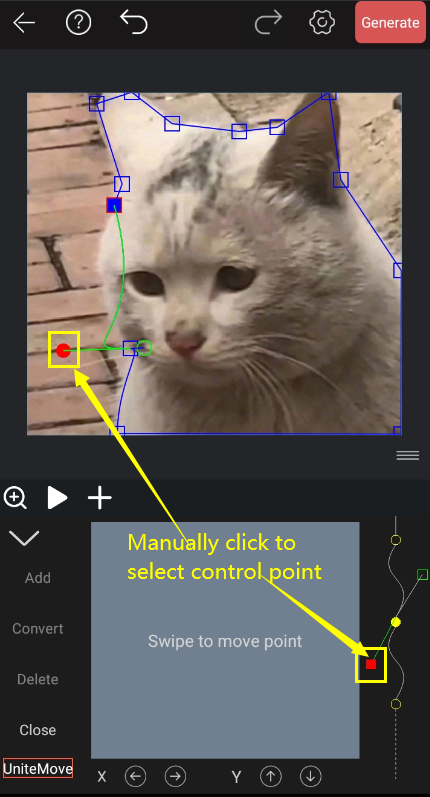
tips: The two curves move relatively simultaneously, that is to say, if you move one of the curve control points, the other will move relatively. If you don't want two to move at the same time, you can click the fifth "Move at the same time" button on the left menu bar to cancel the simultaneous move.
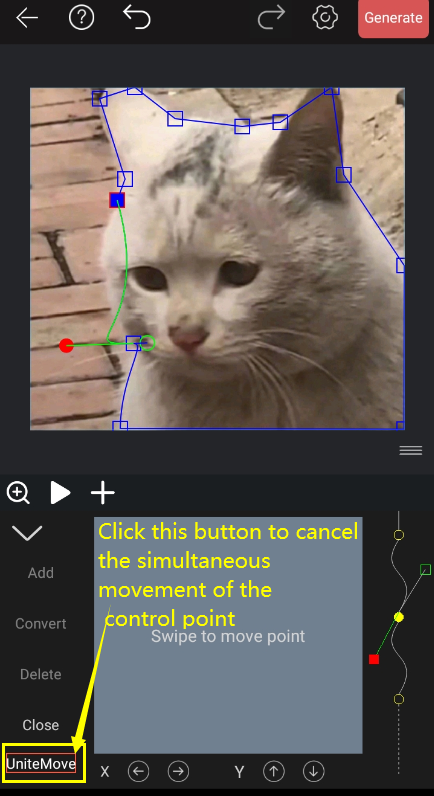
Simultaneous movement effect:
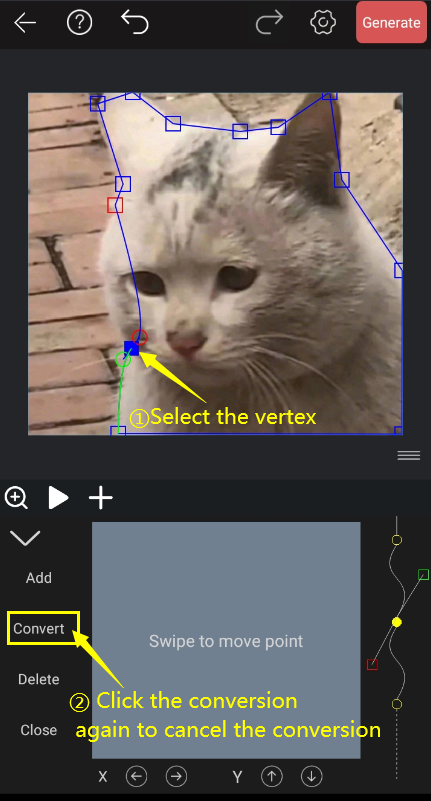
Cancel conversion
Select the converted vertex and click the second "Convert" button on the left menu bar. You can cancel the conversion and the curve becomes a straight line.
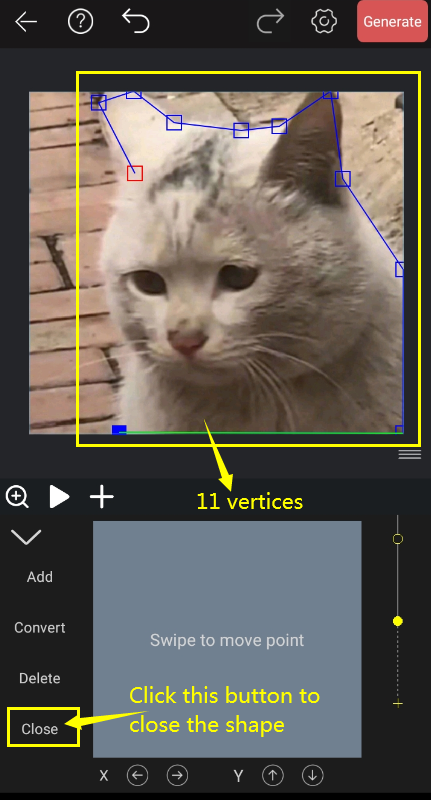
Closed shape
1. When the number of vertices added is greater than 2, the fourth button "closed" will appear in the left menu bar. To close the shape, click the "Close" button.
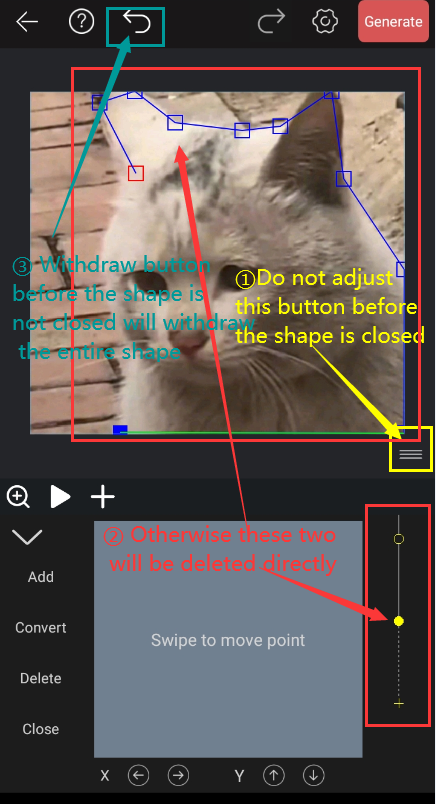
tips: The shape of the mask must be closed (custom shapes may not be closed paths). And in the case that the mask path is not closed, you can not use the button to adjust the ratio at the bottom right of the material, otherwise the vertex and the scroll bar on the right will be deleted completely; Withdraw the entire shape. As shown below.
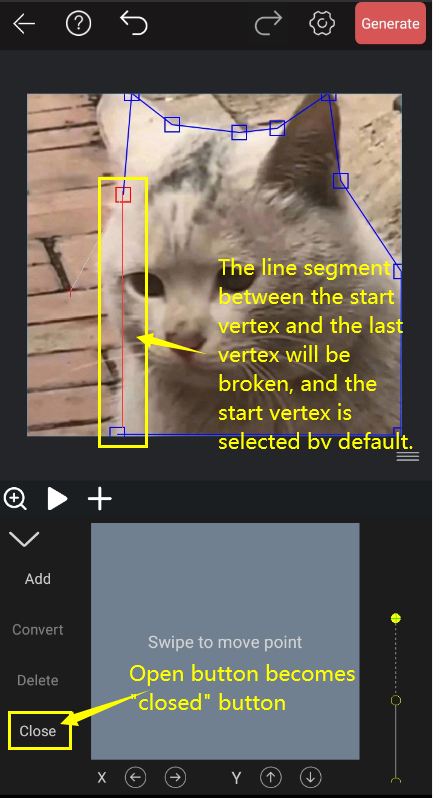
Open shape
1. When the shape is closed, the fourth button "Closed" on the left menu bar will change to "Open". Click the "Open" button once, the line segment at the start vertex and the last vertex will be disconnected, and the start vertex is selected by default, at this time the "Open" button will become "closed" again.
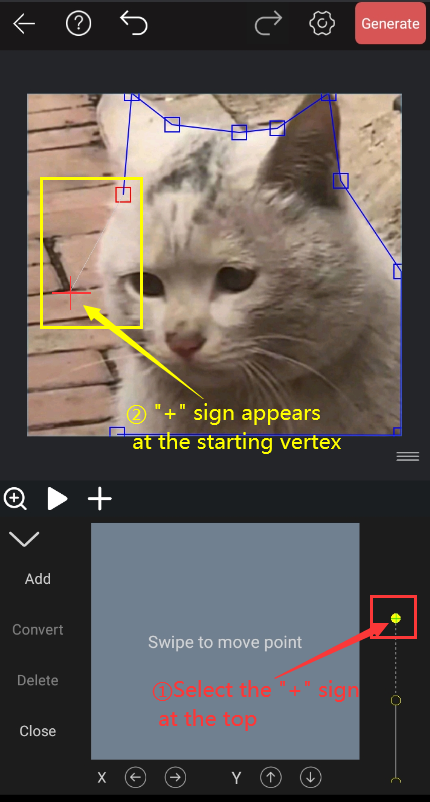
2. If you need to add a vertex outward from the starting vertex, slide up the right scroll area directly, select the top "+", then the red "+" will also appear at the starting vertex, so you can add the vertex Too.
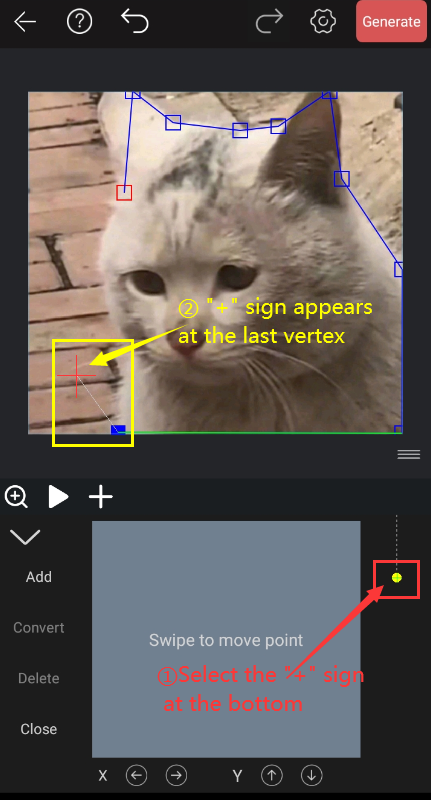
3. If you need to add a vertex outward from the last vertex, directly slide down the right scroll area and select the bottom "+". At this time, a red "+" will also appear at the last top point, so you can add a vertex.